Okay, okay, I know I've been a very bad blogger lately! I've been doing a lot of crafting to get ready for Christmas - but stay tuned for some new patterns! In the meantime here's a great giveaway from One Sheepish Girl! The pillow cases are so gorgeous, they'd look great in any room :)
The instructions on how to enter are on the link :)

Thursday, 20 December 2012
Thursday, 29 November 2012
Falling behind...
I realise I haven't posted a Sunday baking in a while. A long while. Last Sunday we didn't get a chance to back seeing as my boyfriend and I were so busy with uni/school work, and the Sunday before that... Well. We decided to make some White Chocolate cupcakes from a recipe mum had mysteriously found and couldn't remember where from.
It did not go well.
They tasted nice when they were just out of the oven - gooey white chocolate lumps with a bit of a crunchy topping... mmmmm. But as soon as they were left to cool - duhn duhn duuh - they were horrible! They tasted more like scones than anything else. Very dry for a cupcake.


On the plus side I am making a scarf for my friend for Christmas, and as soon as it's finished I'll post the pattern. It's super easy and makes up pretty quickly as it uses chunky wool! I'm also making this cute dolphin for my dolphin-obsessed friend, and it's turning out great so far.
It did not go well.
They tasted nice when they were just out of the oven - gooey white chocolate lumps with a bit of a crunchy topping... mmmmm. But as soon as they were left to cool - duhn duhn duuh - they were horrible! They tasted more like scones than anything else. Very dry for a cupcake.
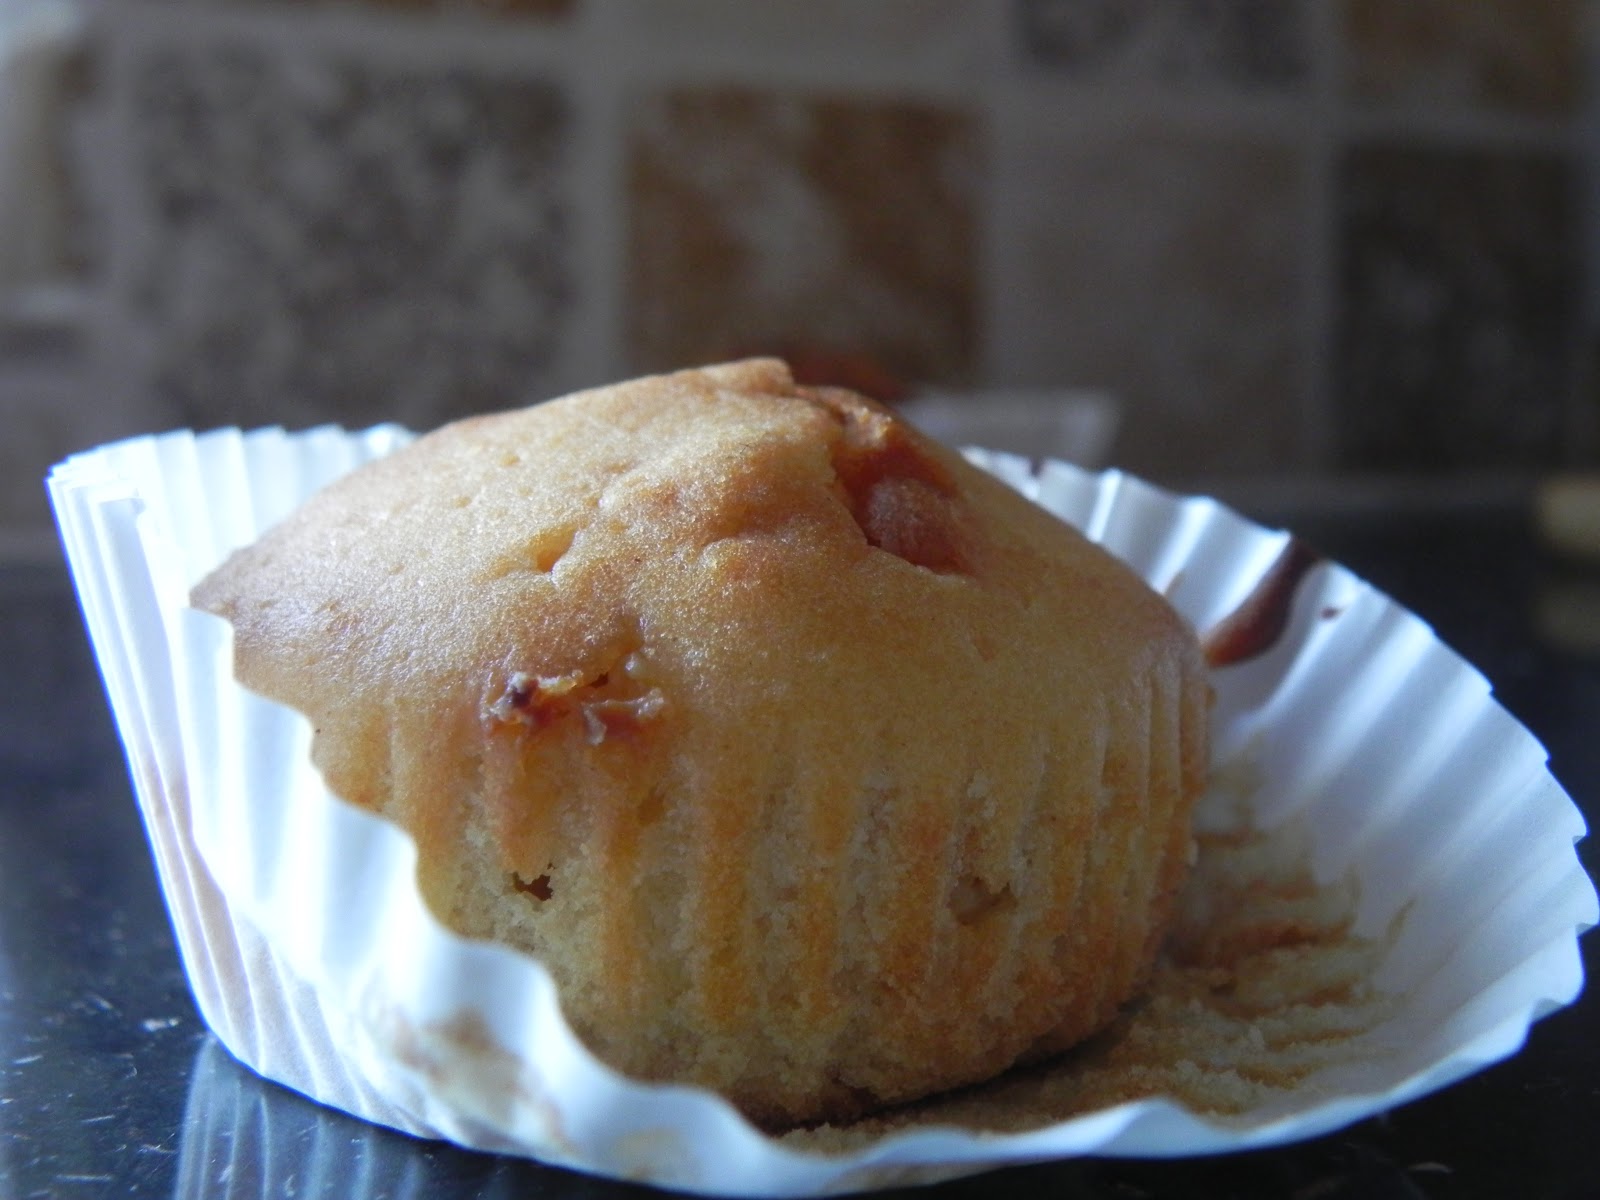

Don't be fooled by how they look! You can tell in the first picture how little they rose, even though the recipe asked for a whole table spoonful of baking powder!
On the plus side I am making a scarf for my friend for Christmas, and as soon as it's finished I'll post the pattern. It's super easy and makes up pretty quickly as it uses chunky wool! I'm also making this cute dolphin for my dolphin-obsessed friend, and it's turning out great so far.
Tuesday, 13 November 2012
Poppy pattern
As you probably know it was remembrance Sunday this Sunday,
and so instead of Sunday baking I decided to make a crochet poppy. Don't worry,
I still donated :) So, here we go! You'll need a 4.00mm hook and some red and
some black DK wool.

R1: Make a magic
circle and chain 3

R2: Dc 11 times into the circle and join with a slip stitch
to the beginning ch3.

R3: Ch3, then dc into the same stitch. Dc twice into the
next two stitches. Dc once into the next stitch. Now we're going to dc into the
same stitch, but this time into the front of the stitch. I hope these pictures explain things better!


Now slip stitch into the next stitch. Ch3, and dc into the
same stitch. Dc twice into the next two stitches. Dc once into the next stitch.
Now we're going to the "dc into the same stitch, but this time into the
front of the stitch" thing again:

^ This is what it should look like by now. Do you see how
doing the 'dc into the front of the stitch' makes the petals more defined?
Slip stitch into the next stitch and ch3, and dc into the
same stitch (we're basically going to repeat the last petal again, but if you
need it I'll write it again :P ). Dc twice into the next two stitches. Dc once
into the next stitch. Dc into the front of the same stitch. Finally, slip
stitch into the ch3 we did at the very start in R1.

Ta-dah! You can either leave the poppy like this, or make a
black circle to put in the middle by making a magic circle, chaining 2 and then
doing 7 or so single crochets into the circle and pulling it tight.

Now just sew the black circle into the middle and sew the
remaining ends in :)

You can either use a safety pin to attach it, or do like I
did at put it onto a ball-chain-lock thingy to hang it from my school bag :)


Enjoy!
Monday, 5 November 2012
Thanks!
I wanted to thank everyone who's viewed my Halloween inspired set - I've now had over 1000 views! Seeing how people have said they wanted to use my pattern and what they thought has made my week, and I want to thank all of you!
Now, this week has been a little different as it was half term at school, and so the two 'Sunday Baking' days became one 'Wednesday Baking'. One of my all-time favourites is Lemon Meringue Pie and I was so excited about making one! We used a tried and well tested recipe from Mary Berry's Day By Day Cooking. I'd definitely recommend getting this book if you can find it! It's got so many good recipies - another one of our favourites is the chicken curry. Me being a student and hopefully moving away to uni after my gap year I'll definitely be taking this book with me. Here are the photo's;


I can't post the recipe here for copyright reasons (I'm guessing), but if you want a free recipe a quick google search gives some good results.
I'm also working on a granny square blanket! It's been a long haul, but finally I'm at the joining stage! Fingers crossed it looks good when its finished.
Now, this week has been a little different as it was half term at school, and so the two 'Sunday Baking' days became one 'Wednesday Baking'. One of my all-time favourites is Lemon Meringue Pie and I was so excited about making one! We used a tried and well tested recipe from Mary Berry's Day By Day Cooking. I'd definitely recommend getting this book if you can find it! It's got so many good recipies - another one of our favourites is the chicken curry. Me being a student and hopefully moving away to uni after my gap year I'll definitely be taking this book with me. Here are the photo's;


Mmm, this is making me hungry for Lemon Meringue Pie!
I can't post the recipe here for copyright reasons (I'm guessing), but if you want a free recipe a quick google search gives some good results.
I'm also working on a granny square blanket! It's been a long haul, but finally I'm at the joining stage! Fingers crossed it looks good when its finished.
Saturday, 27 October 2012
Halloween hat & gloves pattern!
Seeing as I'm not one for dressing up in skimpy outfits in freezing October, I thought the best way to get into the Halloween spirit was to make up some practical things! And here they are, my Halloween hat and gloves...
For both use a 4.00 mm hook and DK wool. You will need just under 100g of orange and a little bit of green. (Pattern in * -- * is repeated to the end of the round.) This pattern uses US crochet terms.
Hat: using orange DK
R1: Ch6 and join with slip stitch to form circle
R2: Ch3, DC 17 times in circle and slip stitch to beginning Ch3 (18)
R3: Ch3, DC into the last round’s Ch3, then DC twice in each stitch. Slip stitch to beginning Ch3 (36)
R4: Ch3, DC twice into next stitch, *DC, DC twice in next stitch*. Slip stitch to beginning Ch3 (54)
R5: Ch3, DC into next stitch, then DC twice into following stitch. *2DC, DC twice in next stitch*. Slip stitch to beginning Ch3 (72)
R6: Ch3, DC into next two stitches, then DC twice into third. *3DC, DC twice in next stitch*. Slip stitch to beginning Ch3 (90)
R7: Ch3, DC into next three stitches, then DC twice into fourth. *4DC, DC twice in next stitch*. Slip stitch to beginning Ch3 (108)
R8: Ch3, DC into next four stitches, then DC twice into fifth. *5DC, DC twice in next stitch*. Slip stitch to beginning Ch3 (126)
R9: Ch3, DC into next five stitches, then DC twice into sixth. *6DC, DC twice in next stitch*. Slip stitch to beginning Ch3 (144)
R10: Ch3, DC into next six stitches, then DC twice into seventh. *7DC, DC twice in next stitch*. Slip stitch to beginning Ch3 (162)
R11: Ch3, DC in all. Slip stitch to beginning Ch3 (162)
R12: Ch3, DC in all. Slip stitch to beginning Ch3 (162)
R13: Ch2, SC in 3, dec 1. *SC in 4, dec1*. Slip stitch to beginning Ch2 (135)
R14: Ch2, SC in 2, dec 1. *SC in 3, dec1*. Slip stitch to beginning Ch2 (108)
R15: Ch2, SC in 1, dec 1. *SC in 2, dec1*. Slip stitch to beginning Ch2 (81)
R16: Ch2, dec 1. *SC in 1, dec1*. Slip stitch to beginning Ch2 (54)
R17: Ch2, SC in all. Slip stitch to beginning Ch2 (54)
R18: Ch2, SC in all. Slip stitch to beginning Ch2 (54)
R19: Ch2, SC in all. Slip stitch to beginning Ch2 (54)
Gloves (make two): starting with orange DK
R1: Ch10 + 1 for turning. Turn (10)
R2: SC in all. Ch1 for turning, then turn. Repeat this another 24 times (so 25 rows of SC in total) or enough to go around your wrist.
R3: Slip stitch the top to the bottom. Bind off.
R4: Work single crochets all around. To fit my hand I single crochet 27 around, and I will use 27 when writing stitch counts at the end of each row – but bear in mind I have slightly smaller hands than average, so if you have particularly large hands, your yarn is not very giving or making this for a man I suggest increasing the number of single crochets in this round.
R5: SC in beginning stitch, SC twice in the next two stitches, then SC all round. (29)
R6: SC in beginning stitch and following stitch, then SC twice in the next two stitches. SC all round. (31)
R7: SC in beginning stitch and following two stitches, then SC twice in the next two stitches. SC all round. (33)
R8: SC in beginning stitch and following three stitches, then SC twice in the next two stitches. SC all round. (35)
R9: SC in all (35)
R10: SC in beginning stitch, Ch5, skip 10 stitches and SC in the 11th. SC all round (30)
R11: SC in all (30) Repeat another 5 times.
Now change to the green DK
R12: SC in all (30) bind off.
Leaf (make three): using green DK
Use this pattern to make your leaves - I made three of the same size and attached one to the back of my hat and one onto the top of each glove. Alternatively you could make smaller ones to go around the top or cuff of your gloves!
Here are some pictures of the final products...


I hope you get to make these for Halloween! I'd love to see any pictures you have of anything you make using my patterns, so just email them to me at dottymiss.x@gmail.com :)
Wednesday, 24 October 2012
Sunday baking and a giveaway
As I was away this weekend, my mum took it upon herself to bake something I'd picked out to make myself! It's a delicious-looking recipe for Coffee Walnut Loaf! She didn't make any changes apart from using margarine instead of mascarpone for the filling, and it was simply mouth watering! Unfortunately this meant I didn't get any pictures of the process, but she assures me it was simple.
I'll copy the recipe here, but this is not my own and I do not claim it to be so!
You will need:
For the loaf -
1) Preheat the oven to 190C/170C fan/gas 5 and butter a loaf tin about 22cm • 8½ in long, 1.3 litre • 2¼ pt capacity.
2) Sift the flour, sugar and salt into a large bowl. Add the oil, egg yolks, coffee and milk and beat with a wooden spoon until smooth.
3) Whisk the egg whites until stiff in a large bowl using an electric whisk and fold into the mixture in two goes. Stir in the walnuts and transfer the mixture to the cake tin, smoothing the surface.
4) Give the tin several sharp taps on the work surface to bring up any large
air bubbles.
5) Bake for 50-55 minutes until a skewer inserted in the centre comes out clean. Leave the cake to cool in the tin for a few minutes, then run a knife around the edge and turn out on to a wire rack. Place it the right way up and leave to cool. If not icing it straight away, wrap it in clingfilm.
6) To make the coffee cream, spoon the mascarpone/margarine into a bowl and beat in the coffee, then the syrup and icing sugar.
7) Slit the cake horizontally, about two thirds of the way up the sides to account for the risen dome. Spread the cream over the lower half and sandwich with the top.
8) To make the icing, blend the icing sugar and coffee together in a bowl and drizzle down the centre of the cake, smoothing it towards the sides using a palette knife. Don’t worry about completely covering the surface or about it trickling down the sides. Decorate the top with the walnut halves and dust over a little icing sugar. Leave to set for 1 hour.


Whilst this is in the oven I suggest you enter this great giveaway! It's from Nicole from Stitch 22, and for the chance to win one of her artworks just follow the steps :)
I'll copy the recipe here, but this is not my own and I do not claim it to be so!
You will need:
For the loaf -
- unsalted butter for the tin
- 225g • 8oz self-raising flour
- 225g • 8oz light muscovado sugar
- ½ tsp sea salt
- 225ml • 8fl oz groundnut oil
- 4 medium eggs separated
- 50ml • 1¾ fl oz cold strong black coffee or espresso
- 50ml • 1¾ fl oz whole milk
- 75g • 3oz nibbed or chopped walnuts
For the coffee cream inside -
- 125g • 4½ oz mascarpone or margarine
- 2 tsp cold strong black coffee or espresso
- 1 tsp golden syrup
- 1 tsp icing sugar sifted
For on the top -
- 100g • 3½ oz icing sugar sifted
- 1-2 tbsp cold strong black coffee or espresso
- 6-8 walnut halves to decorate
- icing sugar for dusting
2) Sift the flour, sugar and salt into a large bowl. Add the oil, egg yolks, coffee and milk and beat with a wooden spoon until smooth.
3) Whisk the egg whites until stiff in a large bowl using an electric whisk and fold into the mixture in two goes. Stir in the walnuts and transfer the mixture to the cake tin, smoothing the surface.
4) Give the tin several sharp taps on the work surface to bring up any large
air bubbles.
5) Bake for 50-55 minutes until a skewer inserted in the centre comes out clean. Leave the cake to cool in the tin for a few minutes, then run a knife around the edge and turn out on to a wire rack. Place it the right way up and leave to cool. If not icing it straight away, wrap it in clingfilm.
6) To make the coffee cream, spoon the mascarpone/margarine into a bowl and beat in the coffee, then the syrup and icing sugar.
7) Slit the cake horizontally, about two thirds of the way up the sides to account for the risen dome. Spread the cream over the lower half and sandwich with the top.
8) To make the icing, blend the icing sugar and coffee together in a bowl and drizzle down the centre of the cake, smoothing it towards the sides using a palette knife. Don’t worry about completely covering the surface or about it trickling down the sides. Decorate the top with the walnut halves and dust over a little icing sugar. Leave to set for 1 hour.


Whilst this is in the oven I suggest you enter this great giveaway! It's from Nicole from Stitch 22, and for the chance to win one of her artworks just follow the steps :)
Sunday, 21 October 2012


Friday, 19 October 2012
Jus-Rol puff pastry!
What you'll need:
- Jus-Rol puff pastry (or any ready made puff pastry)
- White chocolate
- Dark chocolate
- Cheese
- Cinnamon
- Brown sugar
- Salted butter
- Plain flour
- Rolling pin
- A sharp knife and a normal knife
- A clean ruler
So first we'll make the chocolate croissants;


 First put the flour on the work surface - this means the pastry won't stick to it and will be easier to roll! Put some on the dough and the rolling pin too.

Roll out the pastry so it's about 5mm thick.

 Now cut out a square that's 5inches by 5inches, and then cut this in half to make two triangles.

 Now we need to cut the chocolate into fine pieces. We did this buy moving the sharp knife down the side of the chocolate to make shards, but you could also use a grater. Make sure there are no large chunks!

 Next we put the chocolate shards onto the triangle. If making a butter croissant then now's the time to put the butter on. Make sure you use quite a lot - more than in my picture! Ours didn't taste buttery enough at all.

 Here's the tricky part - we need to roll the triangle from the base up. Go slowly and try to make the rolls as small as possible. Once done, bend the long edges towards you and whallah! Cook on gas mark 6 for just over 10 minutes and eat straight from the oven!

For cinnamon swirls:

 Cut out long strips of pastry and cover them in lots of cinnamon. We didn't have any cinnamon so had to use ground mixed spice, but they'd taste much better with cinnamon! If you like a milder hint, sprinkle on the amount shown in the picture. For those who love cinnamon (like me) sprinkle on a lot more and rub it into the pastry! Then roll up your strip, holding it together by putting a little dab of water on the end when you finish rolling. Cook on gas mark 6 until golden!

For cheese twists:
Cut out thick strips of pastry and grate some cheese onto them. Try to press the cheese into the strip so it doesn't fall out! Using both hands, twist the strip and put onto a greased tray straight away so it doesn't have much time to untwist! Put them in the oven on gas mark 6 for 6 minutes, then top with some more cheese and put them back in until lovely and goldeny brown!
Enjoy! Don't forget you can freeze some of the uncooked croissants to bake another time!
- Jus-Rol puff pastry (or any ready made puff pastry)
- White chocolate
- Dark chocolate
- Cheese
- Cinnamon
- Brown sugar
- Salted butter
- Plain flour
- Rolling pin
- A sharp knife and a normal knife
- A clean ruler
So first we'll make the chocolate croissants;


 First put the flour on the work surface - this means the pastry won't stick to it and will be easier to roll! Put some on the dough and the rolling pin too.
Roll out the pastry so it's about 5mm thick.

 Now cut out a square that's 5inches by 5inches, and then cut this in half to make two triangles.
 Now we need to cut the chocolate into fine pieces. We did this buy moving the sharp knife down the side of the chocolate to make shards, but you could also use a grater. Make sure there are no large chunks!
 Next we put the chocolate shards onto the triangle. If making a butter croissant then now's the time to put the butter on. Make sure you use quite a lot - more than in my picture! Ours didn't taste buttery enough at all.
 Here's the tricky part - we need to roll the triangle from the base up. Go slowly and try to make the rolls as small as possible. Once done, bend the long edges towards you and whallah! Cook on gas mark 6 for just over 10 minutes and eat straight from the oven!
For cinnamon swirls:

 Cut out long strips of pastry and cover them in lots of cinnamon. We didn't have any cinnamon so had to use ground mixed spice, but they'd taste much better with cinnamon! If you like a milder hint, sprinkle on the amount shown in the picture. For those who love cinnamon (like me) sprinkle on a lot more and rub it into the pastry! Then roll up your strip, holding it together by putting a little dab of water on the end when you finish rolling. Cook on gas mark 6 until golden!
Cut out thick strips of pastry and grate some cheese onto them. Try to press the cheese into the strip so it doesn't fall out! Using both hands, twist the strip and put onto a greased tray straight away so it doesn't have much time to untwist! Put them in the oven on gas mark 6 for 6 minutes, then top with some more cheese and put them back in until lovely and goldeny brown!
Enjoy! Don't forget you can freeze some of the uncooked croissants to bake another time!
Monday, 15 October 2012
Upcoming blog posts!
It's been a busy week, and so I haven't had much time to blog. But I have got some sneak peaks of what will be up soon!


My crochet angel is getting the finishing touches - a halo and maybe some wings. She's all my own design and I can't wait until she's finished!
 I've also been designing my own crochet gloves! With one down and one to go, a tutorial for them should be up soon :)
 And finally this Sunday was once again baking day! The Sunday before (the 7th) was one of my best friends birthdays, and unfortunately it took up the whole weekend and meant no baking! But this week was experimenting with Jus-Rol Puff Pastry! It was a super easy, super quick and super tasty afternoon.
Stay tuned!


My crochet angel is getting the finishing touches - a halo and maybe some wings. She's all my own design and I can't wait until she's finished!
 I've also been designing my own crochet gloves! With one down and one to go, a tutorial for them should be up soon :)
 And finally this Sunday was once again baking day! The Sunday before (the 7th) was one of my best friends birthdays, and unfortunately it took up the whole weekend and meant no baking! But this week was experimenting with Jus-Rol Puff Pastry! It was a super easy, super quick and super tasty afternoon.
Tuesday, 2 October 2012
Sunday baking!
So my mum has decided Sunday will be baking day! This means that every Monday/Tuesday there will be a cooking-related post :) And to start off with something simple, this Sunday was "Rice Krispies Cake Day".
As it was all last-minute, the weights are a little off, but when measure we had about:
- 60g milk chocolate
- 20g plain chocolate
- 25g milk chocolate
- 30-40g Rice Krispies
Okay, to start we need to melt the milk and plain chocolate together over a pan of warm water. It's best to use a glass bowl, but really any bowl will do. Don't heat it too fast or the chocolate will burn! It's better to warm slowly rather than fast, so make sure you take this into account.


Once all the chocolate has melted add the Rice Krispies. Mix them together really well so all the Rice Krispies are fully covered.


Then put them into whatever dish or bowl or tray you want them to set in. I used a foil tray that didn't really matter and would be easy to remove once the cake had set.
Next melt the white chocolate the same way you did before. As my handy helper (aka the boyfriend) had this job I didn't get any pictures! Let the chocolate cool for a minute, and then using a teaspoon drizzle it over the cake. Work quickly to avoid the splodges I got! It's best to practice a couple of times before hand to make sure you get it just right.

Finally, let the cake set for as long as possible in room temperature. This helps to keep the white chocolate looking glossy!
When finished cut using a sharp knife and serve :')


Enjoy!
Subscribe to:
Posts (Atom)